カスタムビューを使ってみた —
既存のビュークラスを継承してカスタムビューを作成することができます。
最小限のレイアウトとソースコードで、カスタムビューを作成してみました。
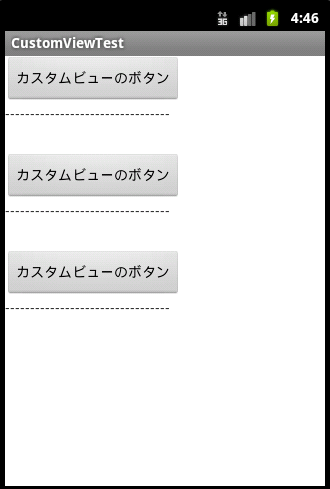
完成図
ソースの構成

下図にて、赤枠で囲んだ部分がカスタムビューになります。
そのカスタムビューを縦に3つ並べました。

今回のカスタムビューは、LinearLayoutで囲ったButtonとTextViewにて構成しています。
まず、カスタムビューのxmlファイルについて記述します。
カスタムビューとして、作りたいパーツで構成します。
<?xml version="1.0" encoding="utf-8"?>
<LinearLayout xmlns:android="http://schemas.android.com/apk/res/android"
    android:layout_width="match_parent"
    android:layout_height="match_parent"
    android:orientation="vertical" >

	<Button
	    android:id="@+id/btnTestButton"
	    android:layout_width="wrap_content"
	    android:layout_height="wrap_content"
	    />

	<!-- 区切り線 -->
	<TextView
	    android:layout_width="wrap_content"
	    android:layout_height="wrap_content"
	    android:text="---------------------------------"
	    android:layout_marginBottom="30dp"
	    />

</LinearLayout>
次に、LinearLayoutクラスを継承して、独自のカスタムビュークラスを作成します。
クラス名は任意の名前でいいですが、とりあえず「CustomLayout」としておきます。
そして、コンストラクタ内でレイアウト用のxmlを読み込みます。
package com.example.custom;

import com.example.customviewtest.R;

import android.content.Context;
import android.util.AttributeSet;
import android.view.LayoutInflater;
import android.view.View;
import android.widget.Button;
import android.widget.LinearLayout;

/** カスタムレイアウト .*/
public class CustomLayout extends LinearLayout {

	/** 通常のコンストラクタ .*/
	public CustomLayout(Context context) {
		super(context);
	}

	/** xml配置用のコンストラクタ .*/
	public CustomLayout(Context context, AttributeSet attrs) {
		super(context, attrs);

		/** カスタムビューのxmlからのlayoutの情報を読み込む. */
		View layout = LayoutInflater.from(context).inflate(
                    R.layout.custom_layout, this);

		/** カスタムビューのボタンに任意の文字を表示する例. */
		Button btn = (Button)layout.findViewById(R.id.btnTestButton);
		btn.setText("カスタムビューのボタン");
	}
}
これにて、カスタムビュー側の処理は完了です。
※通常のコンストラクタの方は今回使わないので、xmlの読み込みは省略しています。
次にメインActivityのxmlファイルにカスタムビューを配置します。
今回はカスタムビューを3つ縦に並べてみます。
パッケージ名を含むクラス名で記述。
今回の例の場合は、「com.example.custom.CustomLayout」となります。
<?xml version="1.0" encoding="utf-8"?>
<LinearLayout
    xmlns:android="http://schemas.android.com/apk/res/android"
    android:layout_width="match_parent"
    android:layout_height="match_parent"
    android:orientation="vertical"
    >

	<!-- カスタムビューを配置 -->
	<com.example.custom.CustomLayout
	    android:layout_width="wrap_content"
	    android:layout_height="wrap_content"
	    />

	<com.example.custom.CustomLayout
	    android:layout_width="wrap_content"
	    android:layout_height="wrap_content"
	    />

	<com.example.custom.CustomLayout
	    android:layout_width="wrap_content"
	    android:layout_height="wrap_content"
	    />

</LinearLayout>
最後に、何も中身がないですが、メインActivityのソースはこちらです。
package com.example.customviewtest;


import android.app.Activity;
import android.os.Bundle;

/** カスタムビュー用のメインActivity.*/
public class CustomViewTestMainActivity extends Activity {
    @Override
    public void onCreate(Bundle savedInstanceState) {
        super.onCreate(savedInstanceState);
    	setContentView(R.layout.main_activity);
    }

}
こんな感じで、カスタムビューを作ることができます。
あとはカスタムビューを自分好みに作り込むだけです。
Categorised as: View関連
コメントを残す